Appearance
Adding a Node
Connection Requirements
- Valid TLS certificate on your Proxmox node
- If you don't have a trusted certificate, you can generate one with Let's Encrypt in this guide.
- We heavily discourage against disabling TLS verification because enables man-in-the-middle attacks.
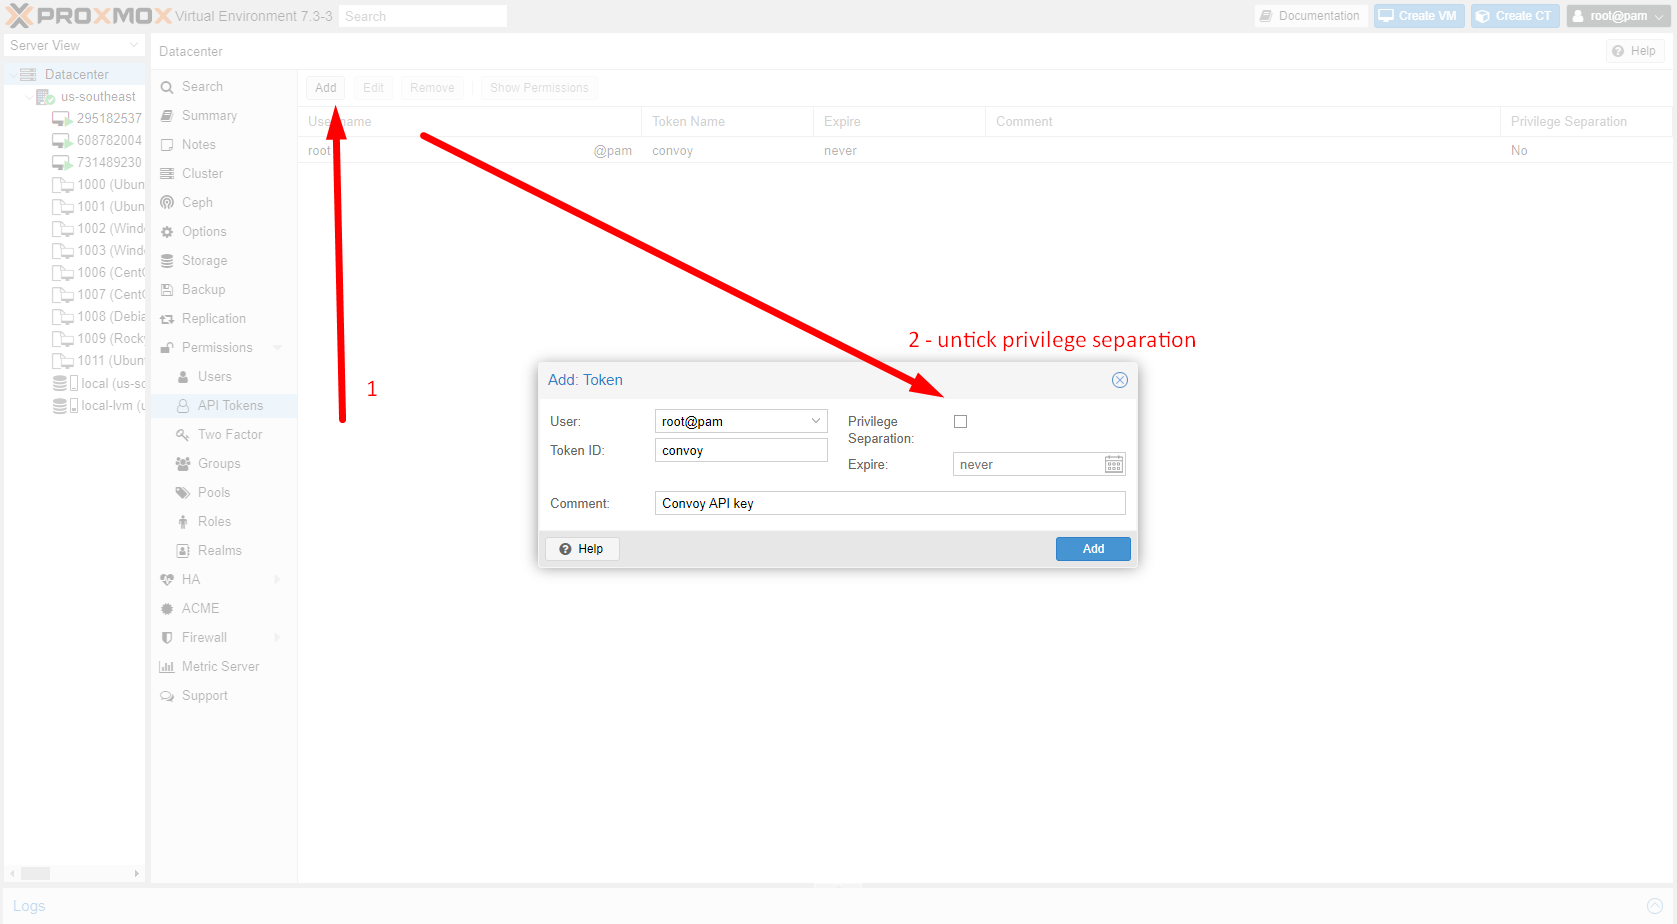
Generating a Proxmox API Token
Navigate to the Proxmox node that you want to add and create a new token.
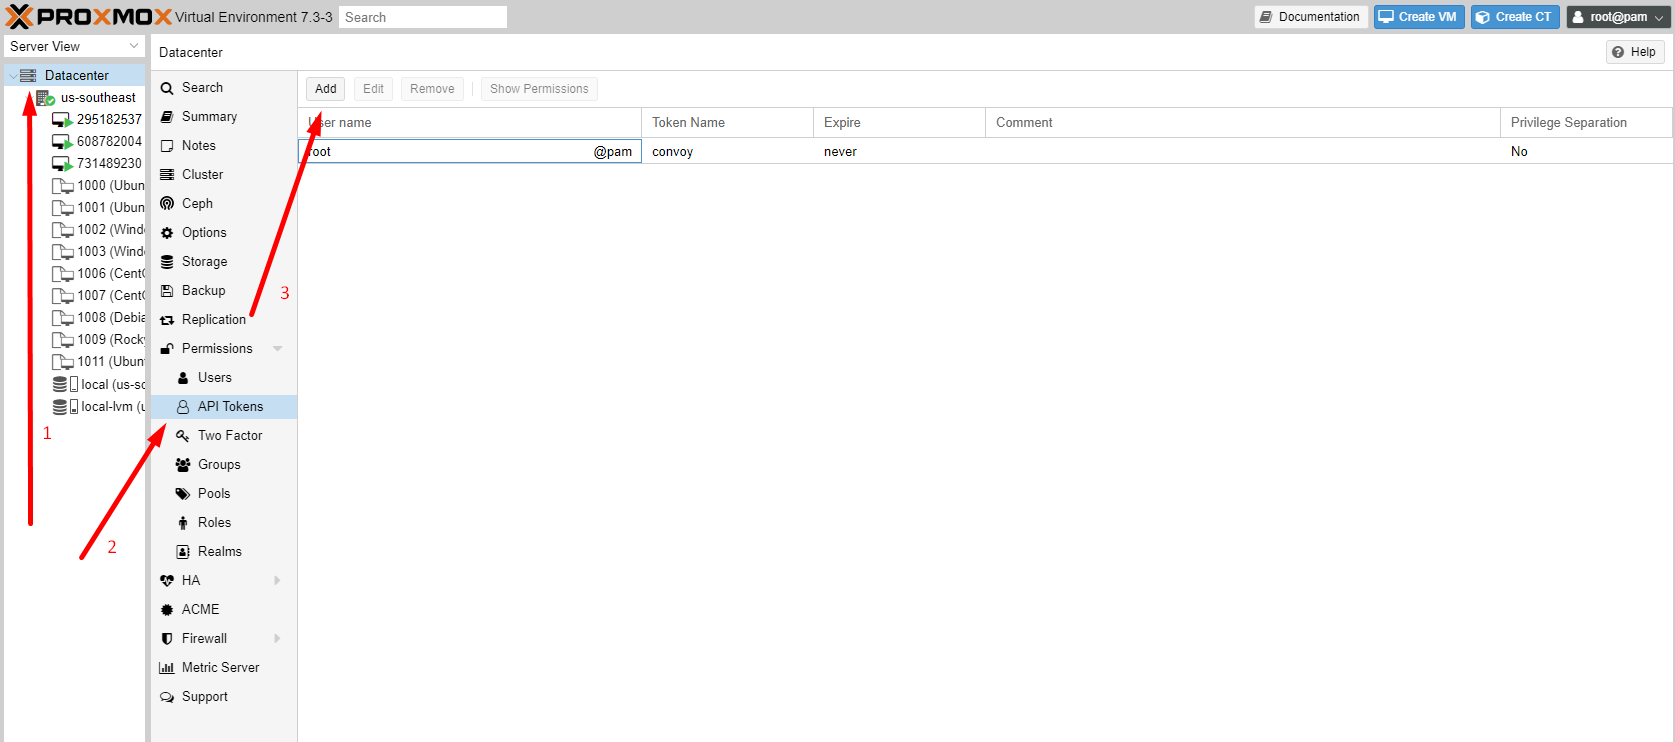
Next, click on Add and generate a new token under a user that has root privileges and verify that privilege separation is disabled.
Adding Location
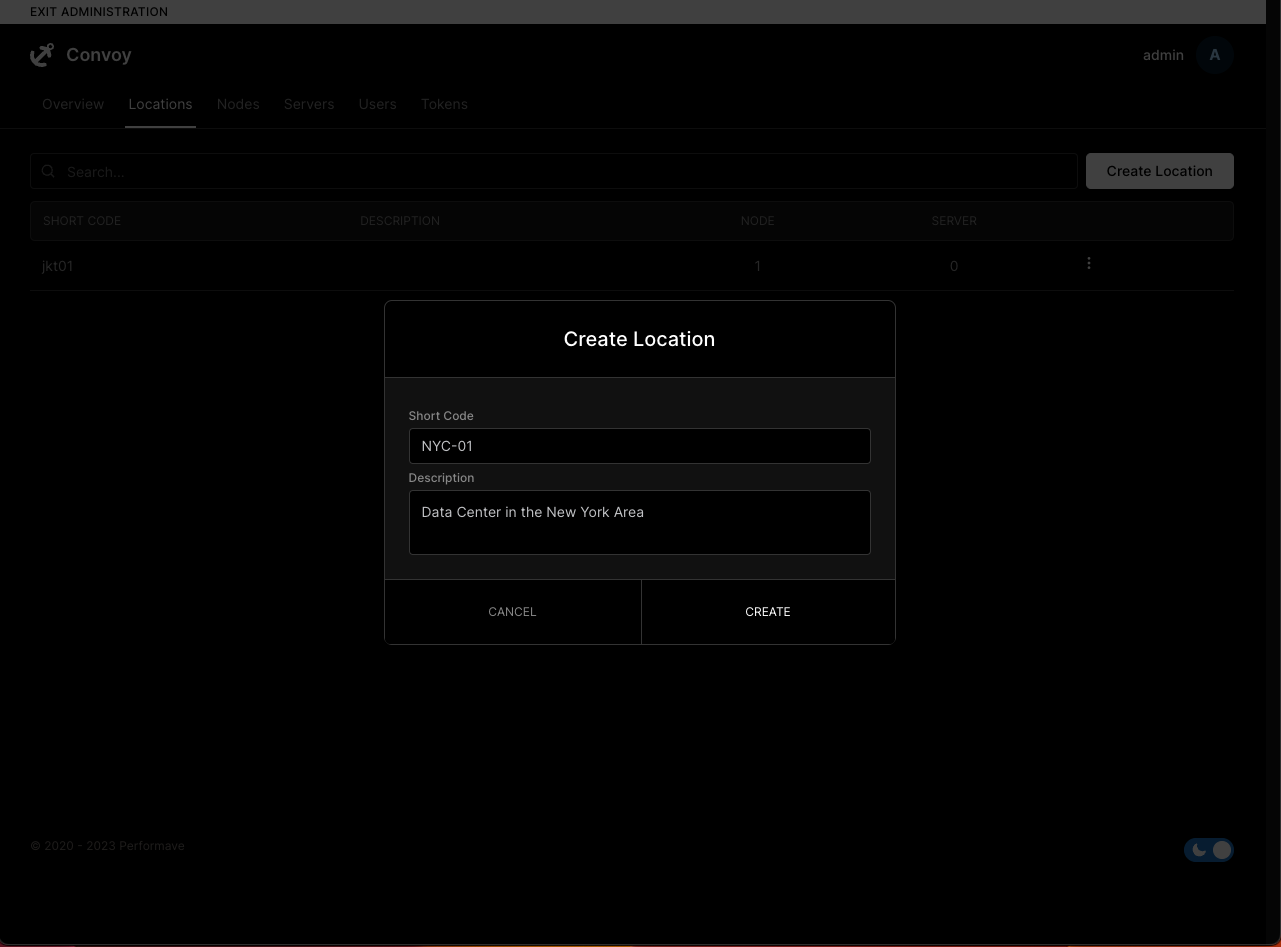
Before adding a new Node, you must create a location for your node. On the Admin Control Panel, click on the Locations tab and click Create Location. Fill in the Short Code and Description. After that, click Create to submit.
Adding the Node in Convoy
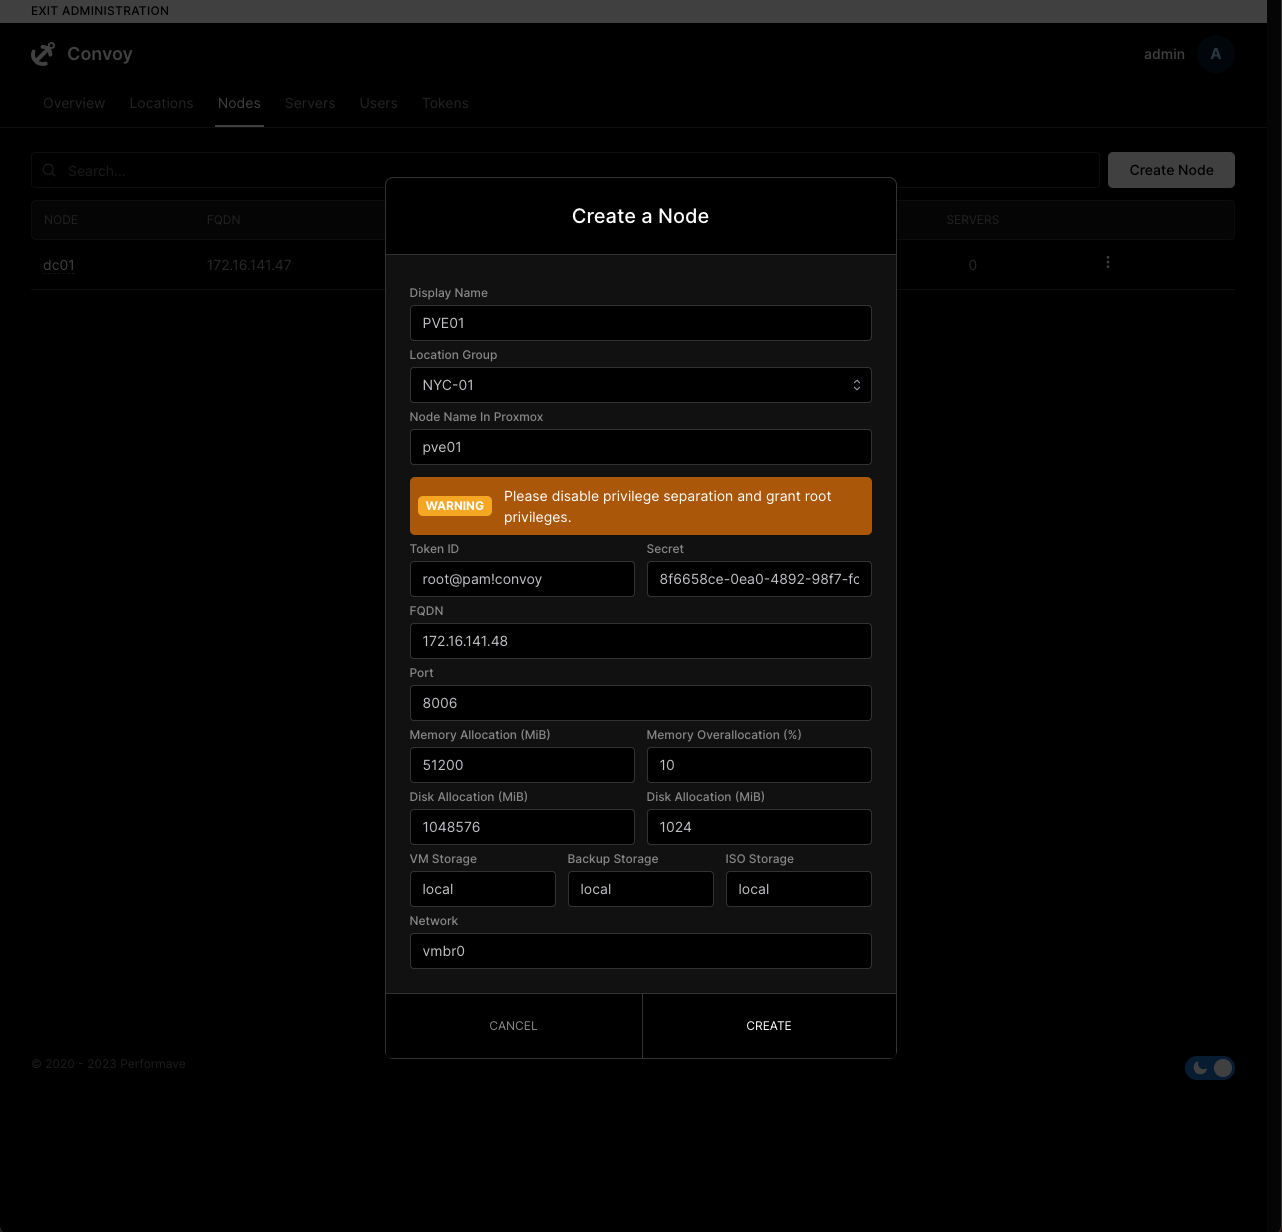
With your API token, navigate to Convoy's nodes page in the administration area and add a new node. Click the Create Node button and fill in the information required.
Display Name: Type any name for identifying your nodeLocation Group: Choose the location you already created beforeNode Name In Proxmox: Type the same name as your node name in ProxmoxVerify TLS Certificates: Check this if you have a valid TLS certificate on your Proxmox nodeToken ID: Paste from your Proxmox user pageSecret: Paste from your Proxmox user pageFQDN: Type your Proxmox IP or FQDN without http/httpsPort: Type the port to access Proxmox. Default8006if you access with IPMemory Allocation: Type how much memory is allocated for managed by Convoy in MiBMemory Overallocation: Type how much memory can be overallocated in percentage (%)Disk Allocation: Type how much disk is allocated for managed by Convoy in MiBDisk Overallocation: Type how much disk can be overallocated in MiBVM Storage: Type name of storage to save disk imageBackup Storage: Type name of storage to save backupISO Storage: Type name of storage to save ISO fileNetwork: Type your network bridge name